You might be far from pro level, but that doesn’t mean you don’t want to play at your best during your beer league hockey season. If you came back from a summer that was more about the beer than staying fit, your first month is prime time for injuries.
“A lot of the time, your hips and adductors are not ready for the intensity and demand they are put under once you start playing hockey again,” says NSCA-certified trainer Chris Cooper, who recently ran himself through his own return-to-hockey program.
Cooper and strength and conditioning coach Luka Hocevar, coach and owner of Vigor Ground Fitness and Performance in Seattle, suggest twice-a-week training that focuses on building strength and power with moves that help prevent the most common kinds of injuries that happen on the ice.
Why the First Month of Beer League Is Prime Time for Injuries
The hips and groin are some of the more common injury sites in non-checking leagues, particularly the adductors, inner thigh muscles that pull your leg back toward your body. Skating pushes your leg out hard to the side, then whips it back under you, which loads the groin, explains Hocevar.
“The quads and outer hips tend to dominate in hockey players, and most players don’t work on the adductors and groin, leaving them weaker and susceptible to injury,” he says. In one study of NHL players, those whose inner thigh muscles measured less than 80 percent as strong as their outer hip muscles were 17 times more likely to strain a groin.
Knees are another highly injury-prone area, and the most commonly hurt part of the lower body in nen’s hockey ER visits. The MCL, the ligament on the inside of your knee, is an easy target. “If a player catches an outside edge or receives an unexpected bump to the outside of the leg while the foot is planted, the knee buckles inward, overstretching the MCL,” says Hocevar.
Shoulder injuries at the AC joint, where the collarbone meets the top of your shoulder blade, are the most common upper body injury in hockey. “Even in non-checking leagues, accidental collisions with the boards, glass, or other players happen all the time,” says Hocevar.
Lower back strains are also an issue, according to Hocevar, especially in rec leagues where many players are coming from sitting at a desk all day. “Essentially, tight hips and weak core lead to overuse of low back muscles,” he says.
How the 4-Week Plan Works
This plan has two workouts a week with a heavier lower body day early in the week, then a lighter power and rotation day. Cooper suggests doing both workouts well before you have to hit the ice. “Try to have the workouts at least two days before the game if possible so you can use the day before as a rest, recovery, or conditioning day in prep for the game,” he says.
Each workout includes at least one single-leg exercise like split squats, which Cooper says is the minimum for busy players. “Single-leg moves help better train stability and strength in your working leg, leading to better power on the ice as you skate,” he says. He’s also a fan of lateral movements, which a lot of players ignore. Both workouts include one, including the Copenhagen plank, which has been shown to greatly reduce the risk of groin problems in athletes.
Hocevar recommends progressing your workouts with a double progression of adding reps over a few weeks, then adding weight and starting back at the bottom of the rep range. As the season gets closer, keep your weights heavy and cut back on total sets.
Related: Veteran Trainer Shares a Simple Winter Warmup Routine That Dramatically Cuts Injury Risk
The 2-Day Gym Plan That Keeps Rec Hockey Players Injury-Free All Season
Do moves A1 and A2 back to back, rest about a minute, then repeat for all sets before moving on to B1 and B2. If you’re short on time, do the A moves and Copenhagen plank on Day 1, and the A moves and lateral lunges on Day 2. If your gym doesn’t have a trap bar, use heavy dumbbells or a kettlebell. You can also switch any cable move for an anchored resistance band.
Warmup
Cooper recommends warming up with some foam rolling and some mobility work like world’s greatest stretch, 90/90 hip switches, leg swings, banded monster walks, and lunges with rotation.
Day 1: Lower-Body Strength
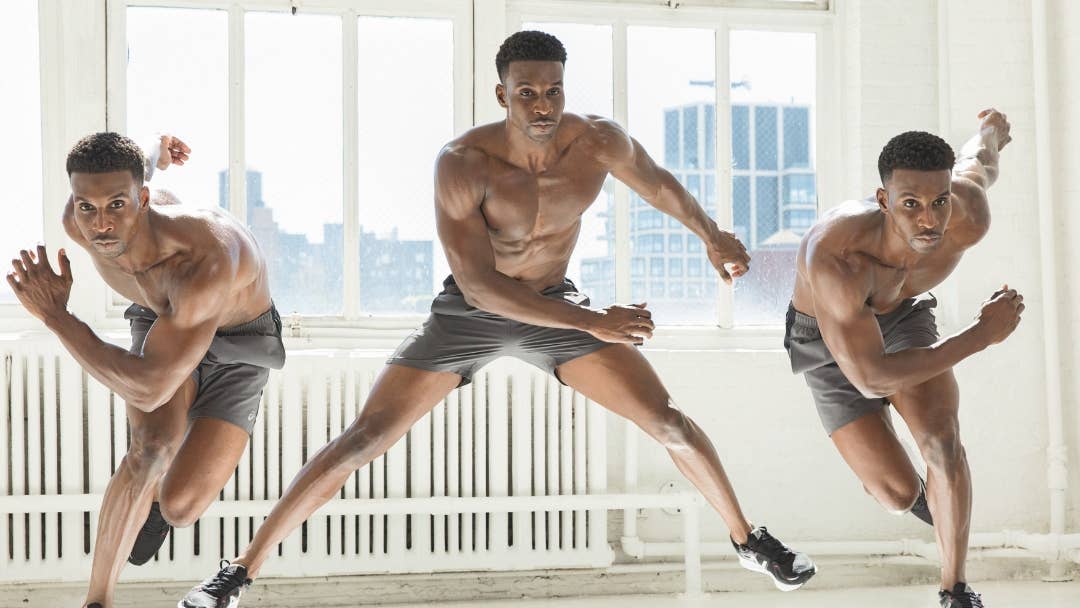
How to Do Skater Jumps
Jay Sullivan
- Jump your right foot to the right, bringing your left foot diagonally behind you, left arm across in front of you, and right arm behind you as you land.
- Don’t touch the other foot to the ground.
- Repeat on the other side; try not to stop once you start.
- That’s 1 rep.
- Perform 3 sets of 5
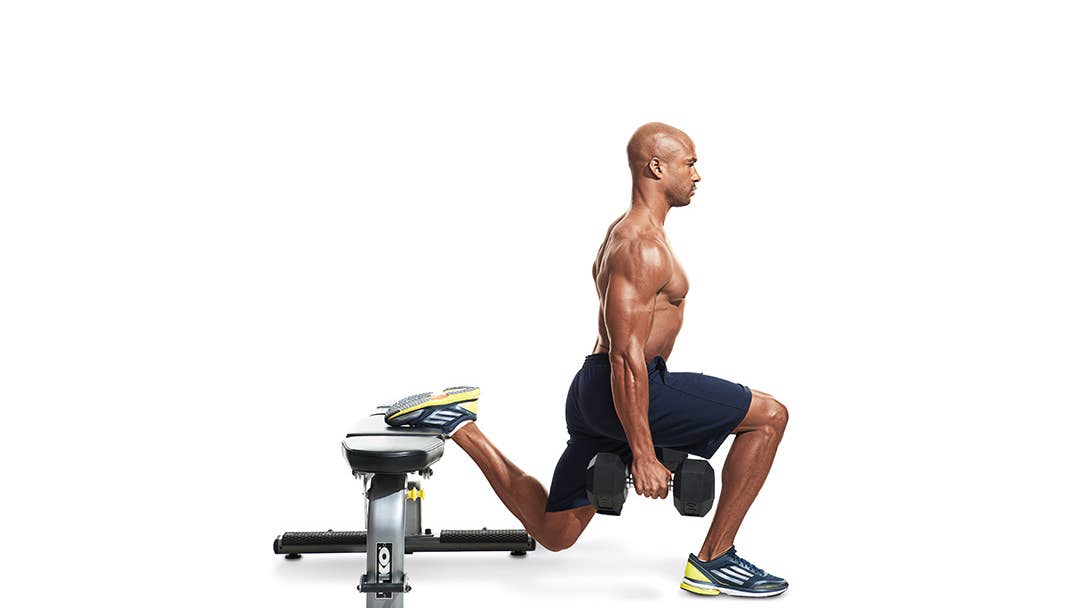
A1. How to Do Bulgarian Split Squats
Beth Bischoff
- Stand roughly two feet in front of the bench with your feet hip-width apart.
- Rest the top of your back foot (laces down) on the bench behind you.
- Engage your core and keep your chest tall.
- Lower your back knee toward the ground until your front thigh is parallel to the floor.
- Push through your front heel to return to standing.
- Perform 3 sets of 6 to 8 reps per leg.
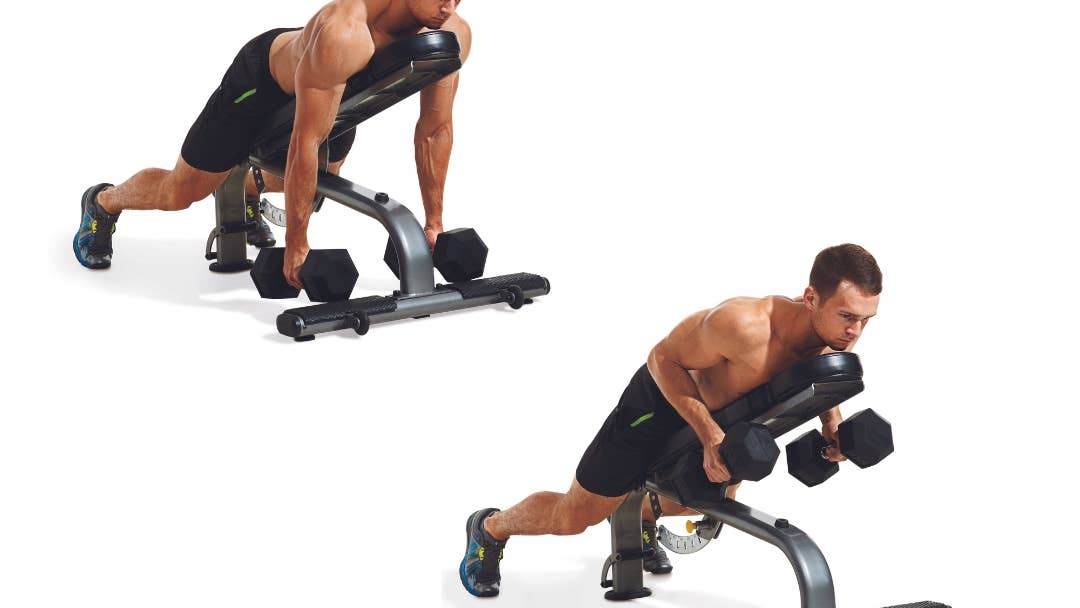
A2. How to Do Chest-Supported Rows
Beth Bischoff
- Lie chest-down on a bench, holding a pair of dumbbells.
- Pull the dumbbells toward your torso, squeezing your back muscles.
- Perform 3 sets of 8 to 10 reps.
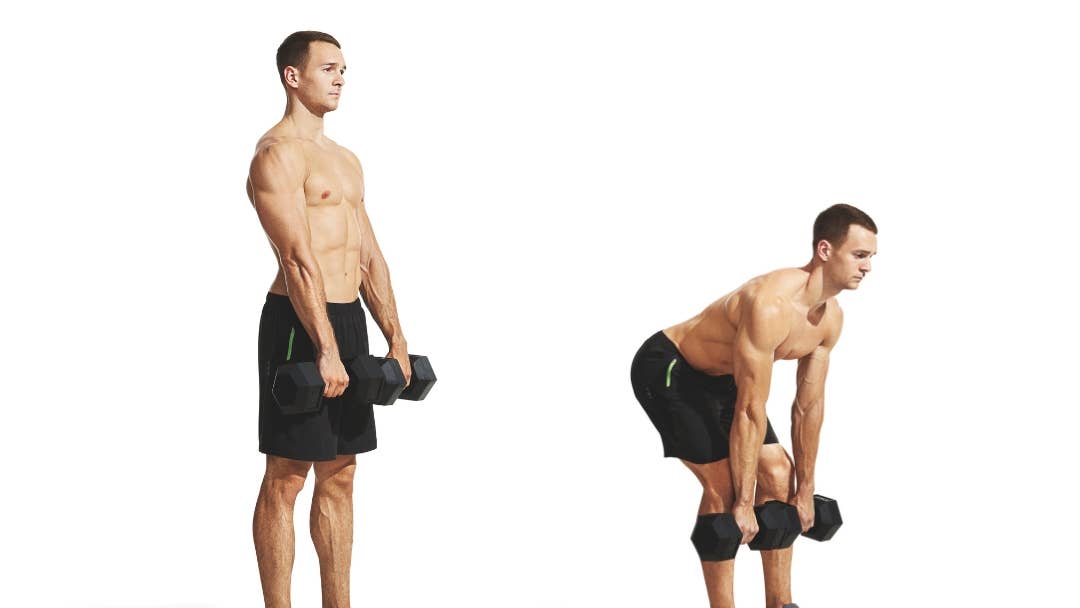
B1. How to Do Dumbbell Romanian Deadlift
Beth Bischoff
- To start, stand with your knees slightly bent, holding a pair of dumbbells with an overhand grip (palms facing you).
- Hinge forward at the waist, lowering the dumbbells toward your shins.
- Contract (squeeze) your glutes and hamstrings to return to a standing position.
- That’s 1 rep.
- Keep the dumbbells close to your legs and your shoulder blades back and down throughout the movement.
- Complete 3 sets of 10 reps.
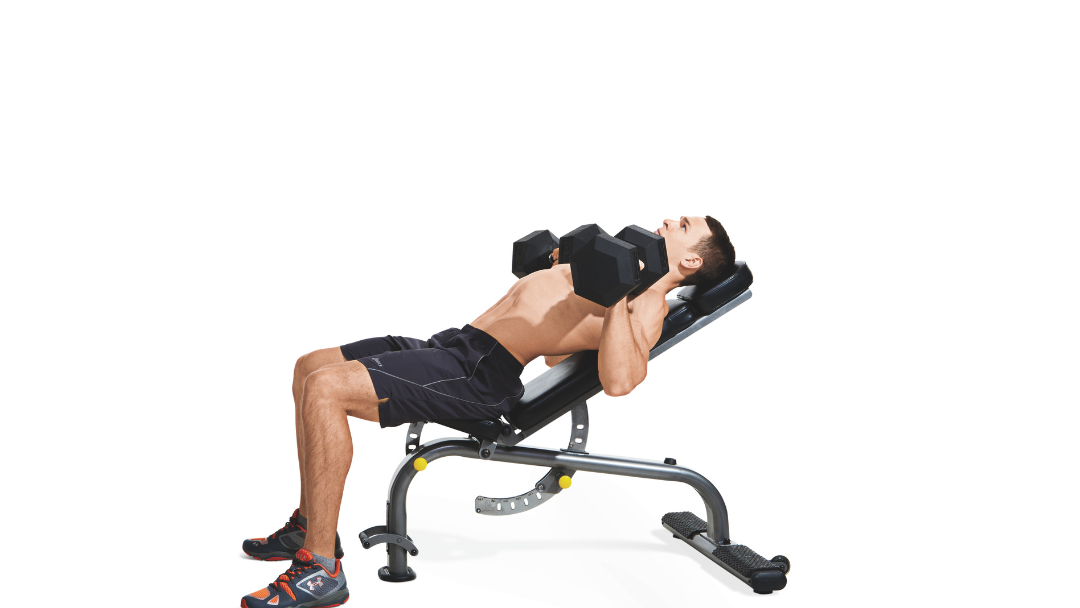
B2. How to Do Incline Dumbbell Bench Presses
Beth Bischoff
- Lie back on a bench set to a 30-degree incline with a dumbbell in each hand.
- Keep elbows tucked slightly and press the dumbbells up until arms are extended.
- Lower the dumbbells and repeat.
- Perform 3 sets of 10 reps.
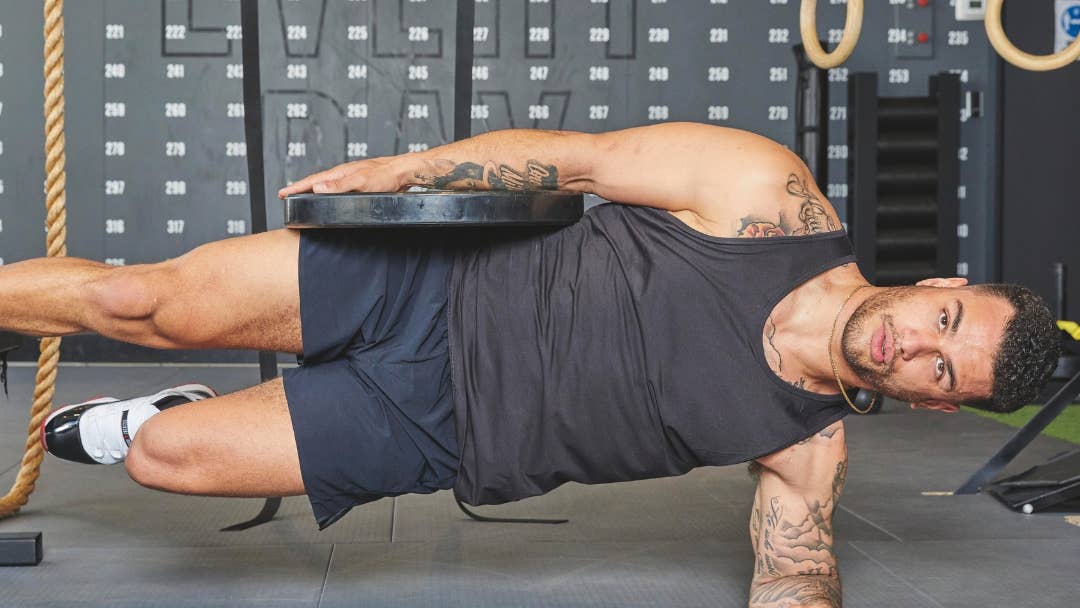
C1. How to Do Copenhagen Planks
Marius Bugge
- Lie on your side next to a flat bench, with your top leg closest to it.
- Rest the inside of your top knee on the bench. In weeks 3 and 4, move to the full version with the inside of your top ankle on the bench.
- Prop yourself up on your bottom forearm, with your elbow under your shoulder.
- Press your top leg into the bench and lift your hips until your body forms a straight line from head to knee.
- Let your bottom leg hang, or lift it toward the underside of the bench for a harder hold. Keep your hips from sagging and breathe steadily.
- Lower your hips and switch sides.
- Do 2 to 3 sets of 15 to 30 seconds per side.
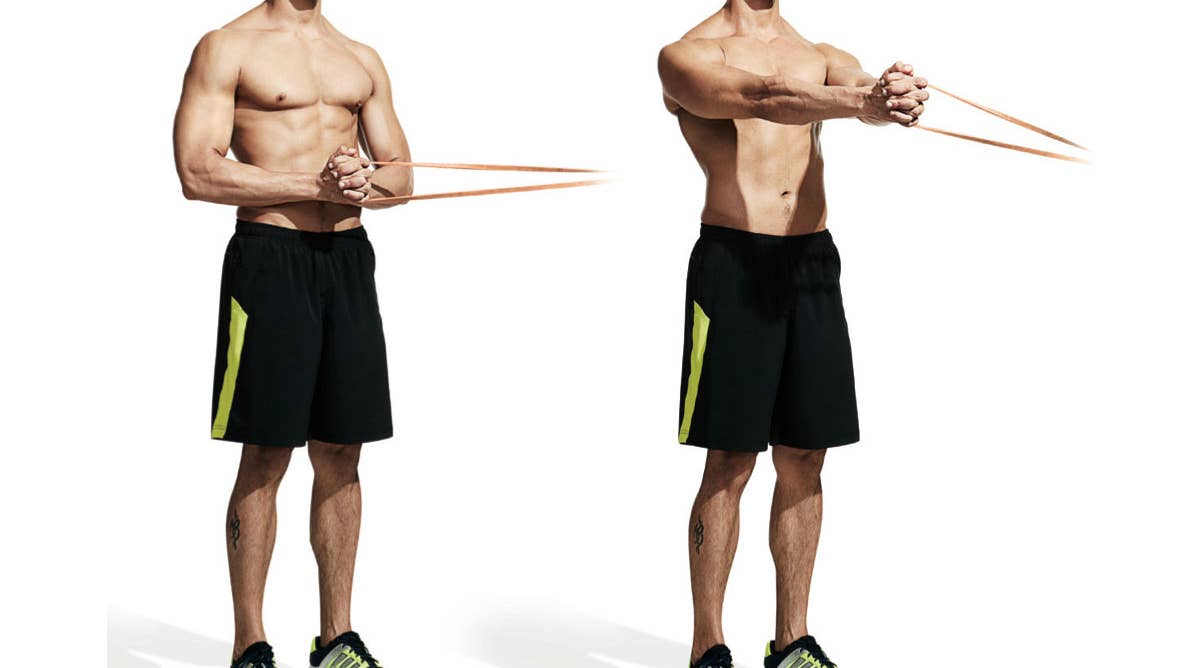
C2. How to Do Pallof Presses
Beth Bischoff
- Attach a D-handle to a cable machine or loop a resistance band around a post at chest height.
- Hold the handle or band at your sternum with both hands and turn so your left shoulder points toward the anchor point, stepping far enough away to create clear tension.
- Stand tall with your feet shoulder-width apart, lock your hips and shoulders square, and press your hands straight out in front of your chest while fighting the urge to let the weight twist your torso.
- Hold that fully extended position for two to three seconds, feeling your whole midsection brace, then slowly control your hands back to your sternum.
- Finish your reps, turn around so your right shoulder faces the anchor point, and repeat on the other side.
- Perform 3 sets of 10 reps per side.
Day 2: Power and Rotation
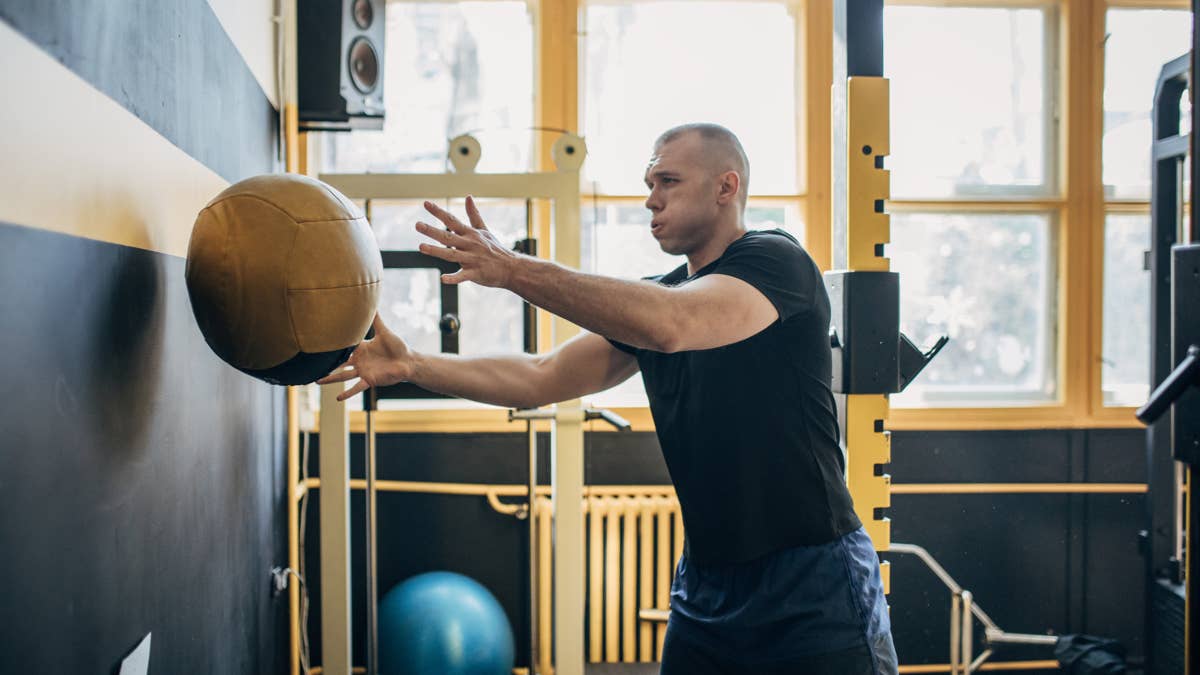
How to Do Medicine Ball Rotational Slams
Getty Images/Hirurg
- Stand with your feet about shoulder-width apart, holding a slam ball at your chest.
- Raise the ball overhead and rise onto the balls of your feet.
- Turn your hips and torso to the left and slam the ball hard into the floor just outside your left foot.
- Pick up the ball, return to the start, and slam it to the right side.
- Keep alternating until you finish all reps.
- Do 3 sets of 5 reps per side. Choose a light ball you can move fast. If you have a sturdy wall, you can stand sideways to it and throw the ball into the wall with a hip turn instead.
- Perform 3 sets of 5 reps per side.
A1. How to Do Trap Bar Deadlifts
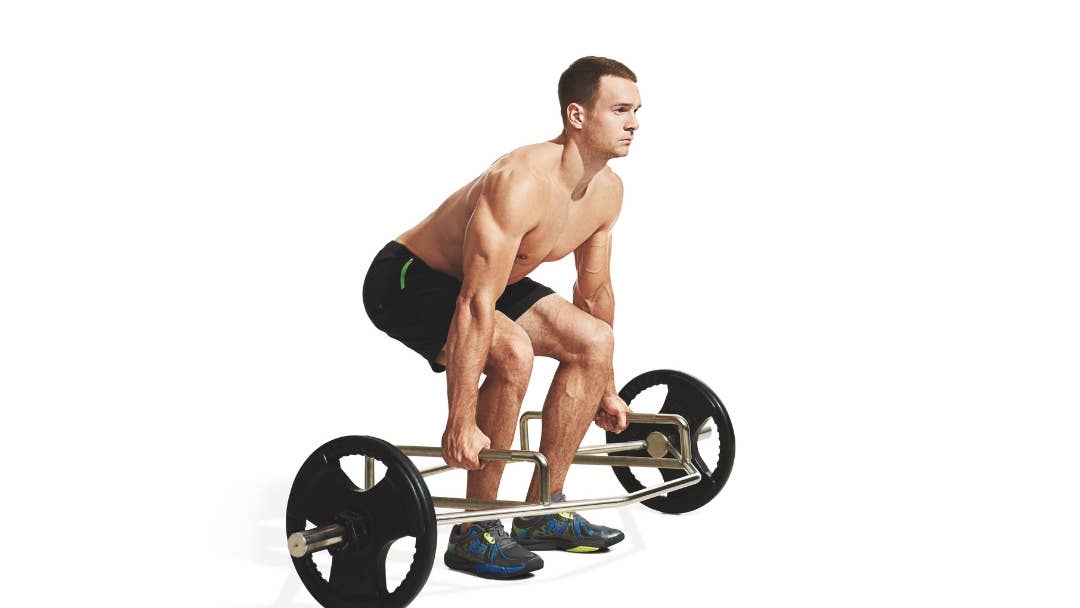
Beth Biscohff
- Standing in the center of a trap bar, bend your hips back to grasp the bar’s handles with both hands.
- Keeping your lower back in its natural arch and your chest facing forward, drive through your heels to lift the bar off the floor and lock out your hips.
- Make sure to keep the bar close to your body throughout the movement.
- Perform several warmup sets, increasing the weight gradually until you reach your desired weight.
- Perform 3 sets of 5 to 8 reps.
A2. How to Do Standing Dumbbell Overhead Presses
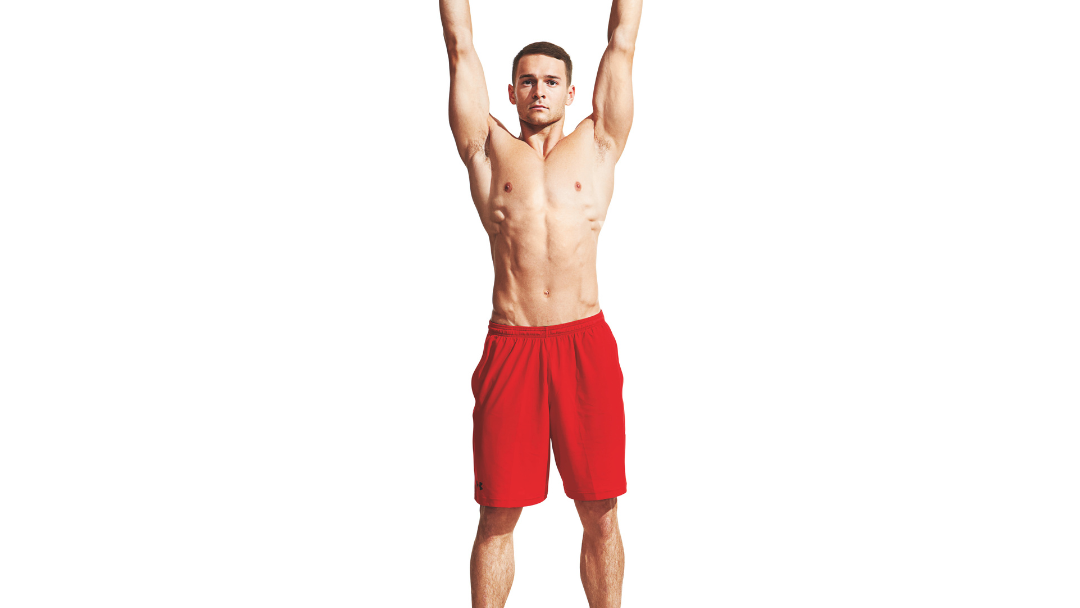
Beth Bischoff
- Take a dumbbell in each hand and stand tall with feet shoulder-width apart and pointed forward, legs straight but not locked out, to start.
- Lift the dumbbells up to shoulder height with the palms facing away from you.
- Your upper arms should be perpendicular to the floor, and you should have a 90-degree bend in your elbows.
- Make sure your spine is straight, your core is tightened, and your shoulder blades are back and pinched close together while looking straight ahead.
- This is the starting position.
- Press the dumbbells up over your head, and allow your elbows to come in front of you so you are in a proper scapular plane.
- Once your arms are straight, hold this position briefly before slowly lowering the weights under control to the starting position.
- Perform 3 sets of 8 reps.
B1. How to Do Reverse Dumbbell Lunges
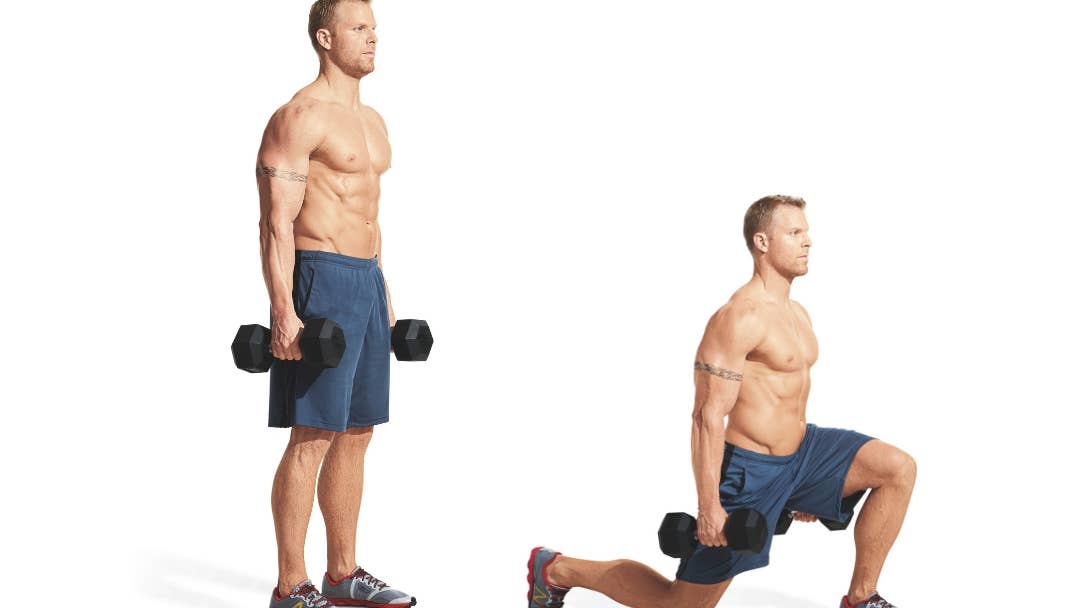
Beth Bischoff
- Keeping a neutral spine, take a step backward with your right leg.
- Once your knee almost touches the floor, push back up and forward to your starting position, trying to maintain level hip alignment throughout and keep your weight in your back leg.
- The big difference here is you’re using your front leg to stabilize your body.
- Complete 3 sets of 8 reps per side.
B2. How to Do Neutral Grip Pullups
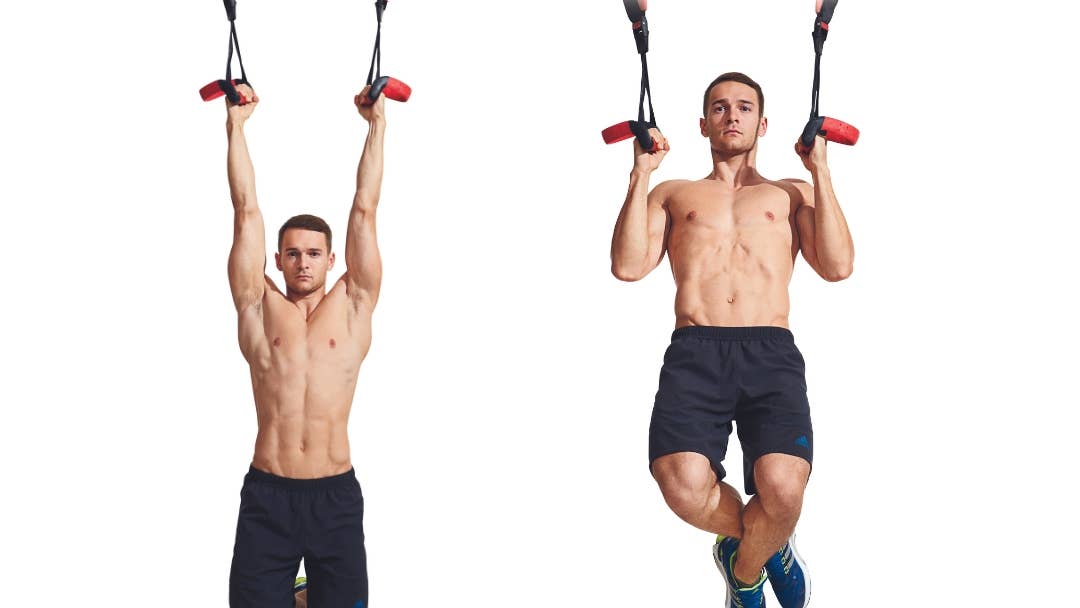
Beth Bischoff
- Using assistance like a box or step, hop up to the top position of the pullup, to start.
- Hold a neutral grip pull-up bar with your palms facing one another.
- Lower yourself slowly by resisting the descent. Allow 5 to 10 seconds before you reach a dead hang, and aim to keep good form and upper-back tension throughout.
- Do 3 sets of 6 to 8 reps.
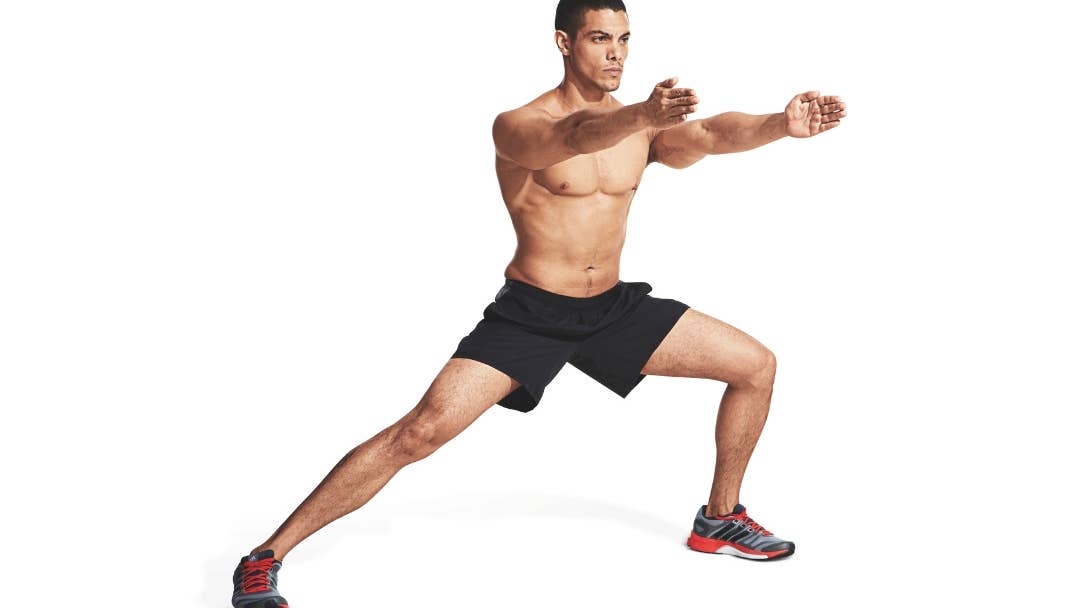
C1. How to Do Lateral Lunges
Beth Bischoff
- Step out to the right, keeping your toes pointed straight ahead and feet flat, to start.
- Squat down as low as possible only with your right leg, keeping your left leg straight.
- Hold for two seconds.
- Return to the starting position and repeat for 3 sets of 8-10 reps on each side.
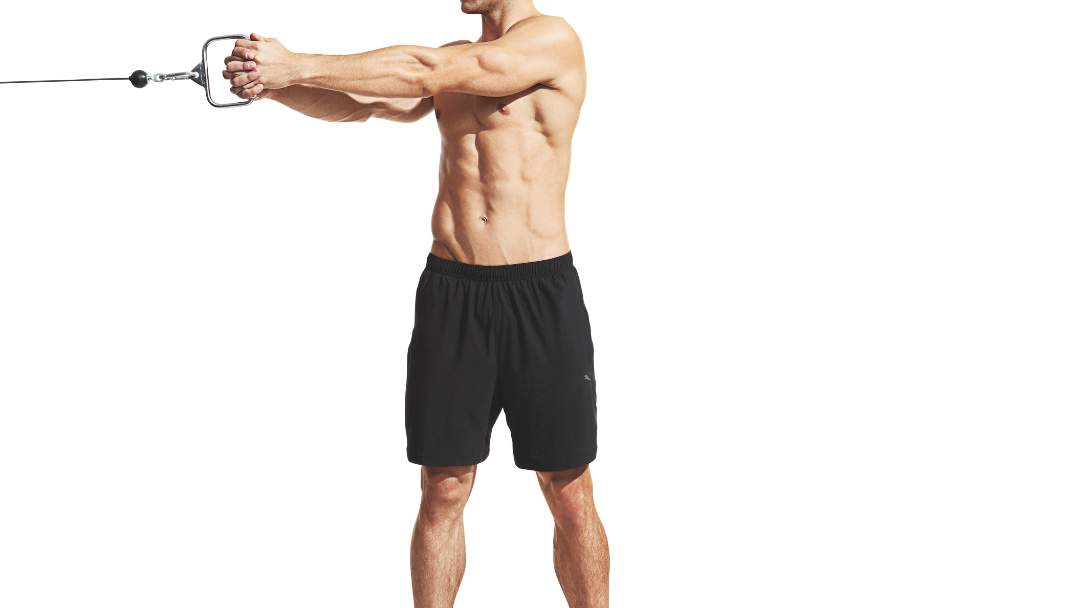
C2. How to Do Cable Chops
Beth Bischoff
- Take a wide athletic stance perpendicular to a cable or anchored resistance band with arms extended at chest height.
- Rotate through your midsection to pull the handle across your body while keeping arms long.
- Control the return, resisting the pull.
- Perform 3 sets of 8 to 10 reps on each side.
Keep Going After Week 4
You’ll be in better shape and less likely to pull something unmentionable after going through this program for four weeks, but Hocevar advises players to keep going. “A month or two isn’t enough to have the body truly prepared for a season. Strength and performance training should be done year-round,” he says. Even NHL players who do fewer than 18 training sessions off-season have more than three times the risk of a groin or abdominal strain during training camp, so more is better. Just aim for two sets on Day 2 during game week so you don’t overdo it. If you can only do one thing, make it the Copenhagen plank.